Never Miss a Post
Sing up for our email Newsletters
Ananta Mandal Email NEWSLETTER is only one click away
We respects your privacy, your info and Email address are safe with us, That is our promise to you.
Tuesday, 05 October, 2021
Category : Painting step by stepLEAVE A COMMENT
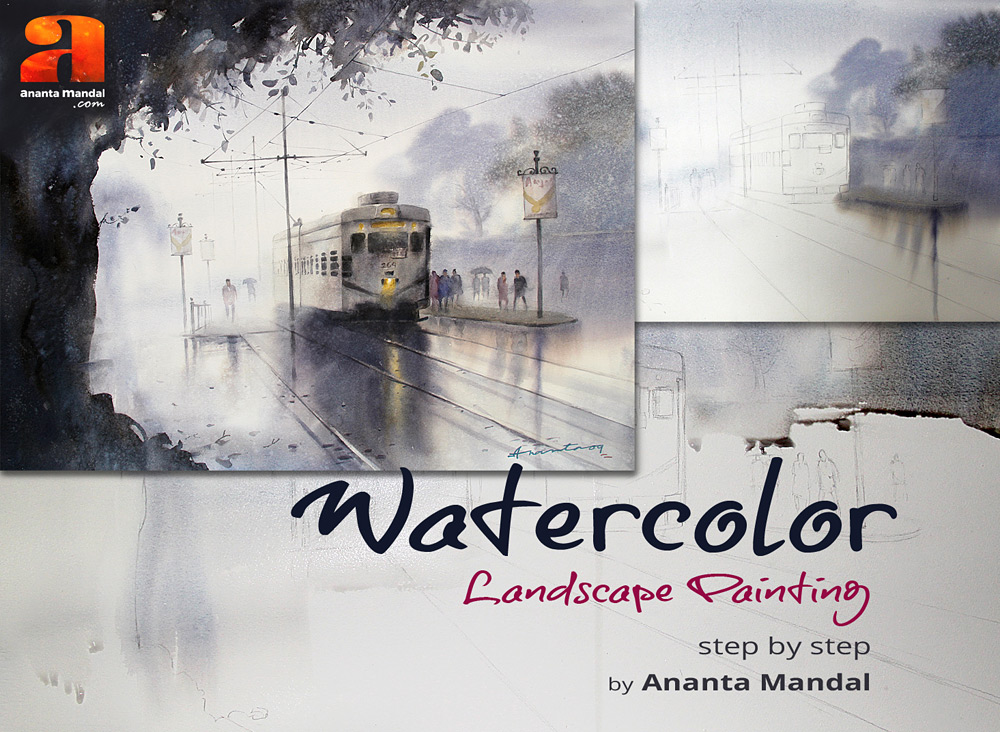
Usually I love to prepare demonstrations of my artworks while I do my paintings in my studio. I love to do this and it’s a common practice for me but sometime seems to be very useful. It’s important to have quite a few demos of various subjects in watercolor landscape painting so that when I want to share them with you I can get a handful of options to select from. That’s why I thought it’s been a long time since when I published them on my blog. So I decided to share one from the old demos I had prepared for this painting in the year 2009.
In short words it is about a simple approach to watercolor landscape painting and how a painting is done following some easy steps one by one. I have used some colors, a few layers of applications and it is done. Though it sounds short but I will explain in detail every possible aspects so that you understand every bit of it. It’s one of my old favorite paintings. While doing the work, in the entire process I just have tried to anticipate how the colors will react, rather than my action for how it behaves.
Now a step by step breakdown of the entire process follows further down the page along with the images for your easy understanding.
Let’s check out what Materials I used!
Fabriano Artistico traditional white Watercolour Paper Cold press 300 GSM (size 22″ x 30″ inches)
2B Pencil and Eraser, Palette for mixing paint, A container filled with clean water, Cotton Cloth or Tissue paper
I used Winsor and Newton Professional Watercolour paints containing the following colors.
Crimson Lake, Cadmium Yellow, Cadmium Orange, Yellow Ochre, Cobalt Blue, Cobalt Blue Light, Cobalt Turquoise, Cerulean Blue, French Ultramarine, Ultramarine Blue, Burnt Umber, Burnt Sienna, Raw Umber and Payne’s Grey
Round brushes of no. 00, 1, 2, 3, 4, 6, 8, 12, 18, 30

I start with a basic pencil drawing that will surely help for the upcoming steps. So I have created a line drawing of the composition on 300 gsm Fabriano paper using a 2B pencil. The sketch should be light and loose, just basic! This will guide to point out the main elements of the painting easily. So don’t overdo the drawing as colors will do the rest of it. So here I point out mainly the tram, tram line, few figure movements on the streets and remaining light posts, trees here and there. Sometime if I feel this is not enough I define few more objects to help in coloring further.
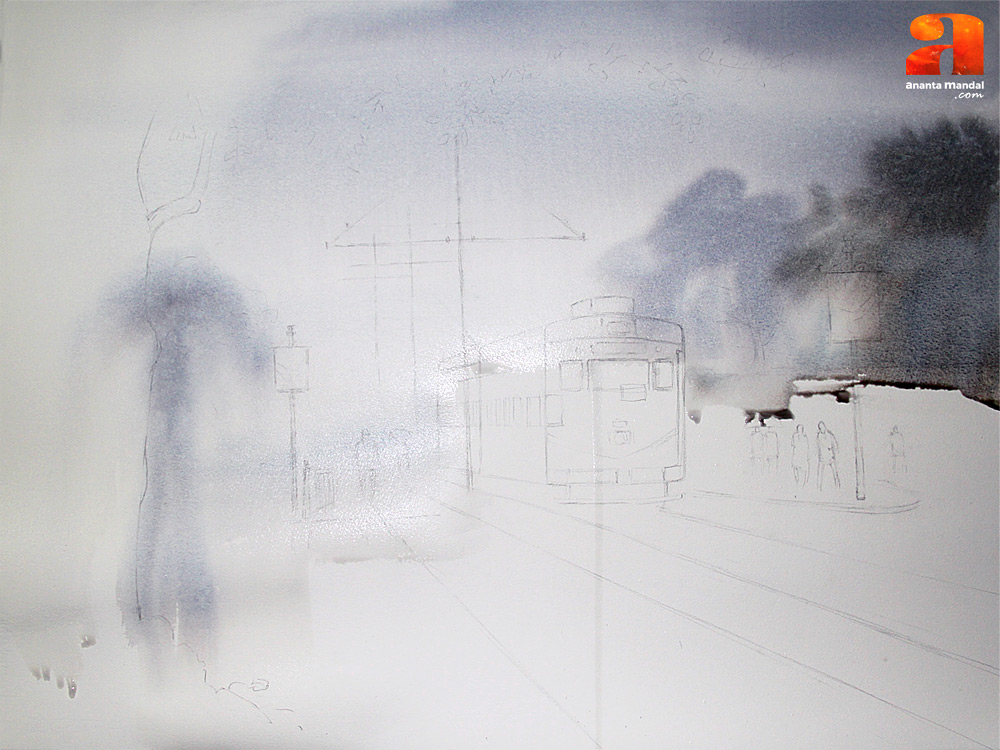
Don’t you feel in painting to handle the flow of watercolor is challenging yet full of fun! I feel so and that’s why I say there is no hard rule that you always have to start coloring painting from top. Actually it depends on the subject as well. In this kind of landscape orientated subject normally I prefer to start with the sky first. So for the sky part I prepare the color by mixing cobalt blue light, french ultramarine and very little cadmium orange. The color is thin enough because if the shade becomes too much pigmented according to this subject the sky may look stiff after the color wash. Also take the same note that I continue this same method for the entire basic part in painting to maintain the soft tonal effect. After the sky color is prepared, taking brush 30 I wet the top part of the paper. I use wet-on-wet technique which is best to handle both paint and water for the sky. Check the top part is thoroughly wet but not over wet. Now holding the board at 25 degree angle, the sky is washed down with the mixing color. The wash should be applied quickly on wet-on-wet condition using the same large brush 30. Now matching the mood of the painting I do the far background.
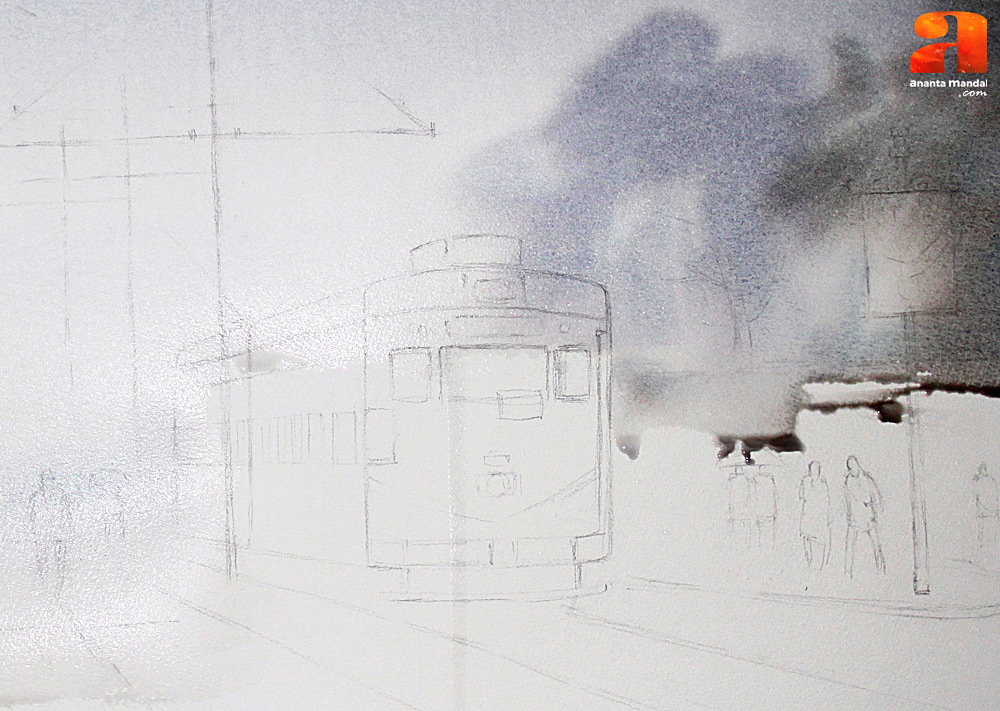
I wash with the color for the tree line which are aligned far away in the painting. For that a little thick color is prepared by mixing ultramarine blue, crimson lake and burnt sienna hue. In wet condition I apply the color mixture using 12 and 18 no brushes. You may notice how the color settles. This first tone will somewhat create the mood for the rest of the painting.
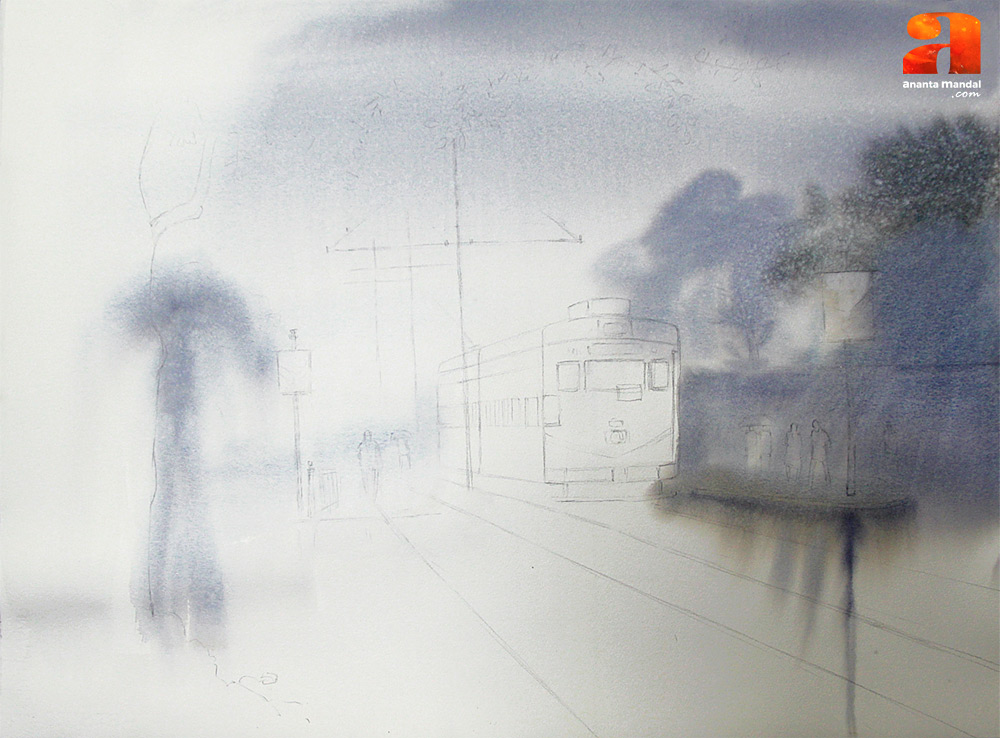
I’m still working in wet-on-wet technique. Will be coloring the mid background towards the ground, refection of hoarding board and figures movements. I mix payne’s grey and raw umber with the previous color and use it on the street to show the strong reflection of the hoarding post.
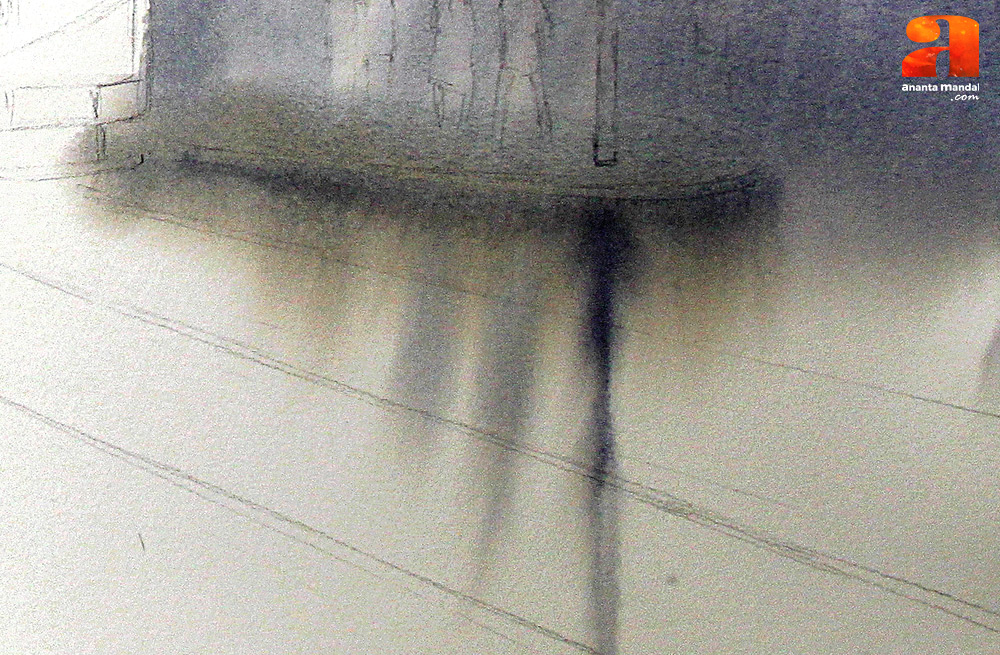
After that I make the color little warm to show the reflection of the human figures aligning downwards from the foot path. Now I move further down to color the street. Here I use the brushes 6 and 8. So within few minutes an allover soft tonal contrast is created.
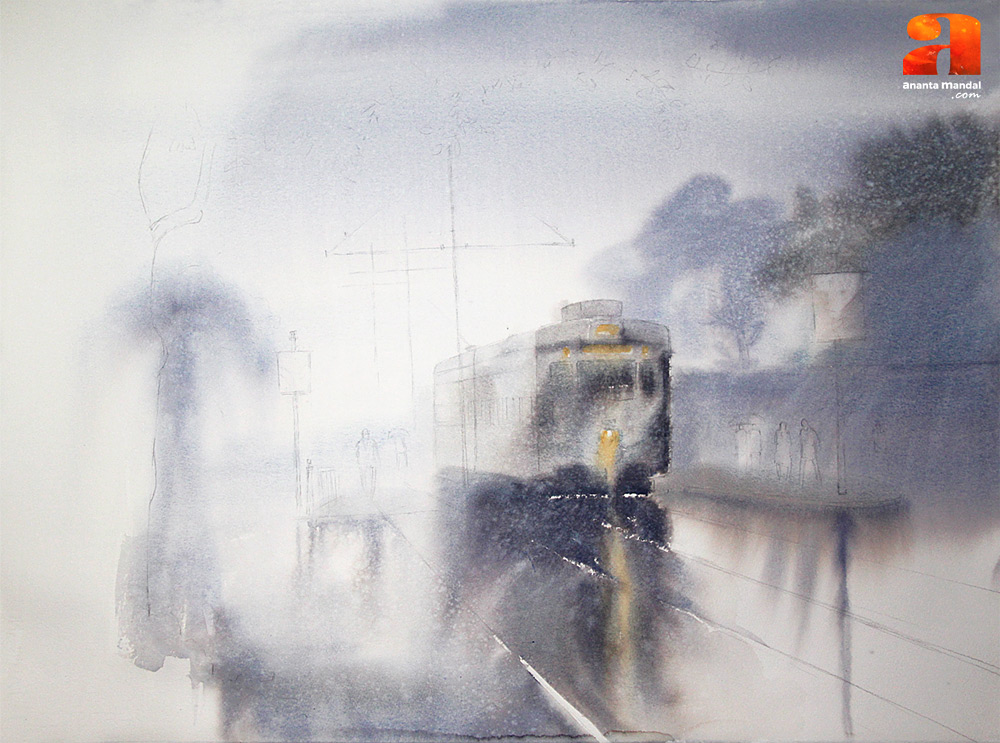
As I am going to give it a feel of foggy morning atmosphere wet-on-wet method will help to create the smoothness needed for this foggy vibe. First I start from the top of the tram. I take brush 8 and create a color with cobalt blue, french ultramarine, raw umber and yellow ochre and do a basic layer of the tram leaving paper white very carefully for maximum highlight. Then I make some strokes to shape out the edges and the deep parts of tram in a spontaneous way adding thick payne’s grey with the color. Along with that I use raw cadmium yellow using 3 no brush in quick strokes on all the lights part of tram. The lights of tram is normally warm and as it’s a foggy weather so the lights become more soft and warm. With remaining color I mix burnt umber and payne’s grey using 12 no brush to create the strong weight under the tram. Here also needed to be careful to leave the paper white for strong highlight. I also show the reflection of light on the road using cadmium yellow.
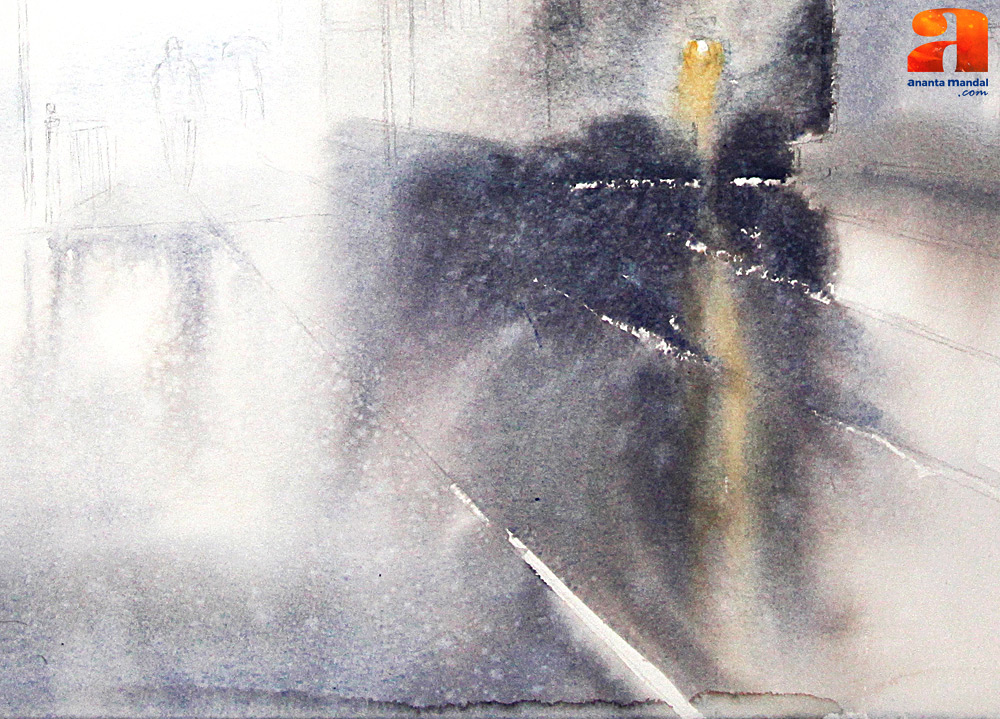
Then I wash and merge the color with the road. So I am doing reflection part from the midground to fore ground very carefully leaving paper white for tram line when flow of the color is coming to fore ground. While doing along with that I spray clean water to the entire this area to create the mood of raindrops.
So! Now it’s time for a short break! Meanwhile I let the painting dries completely. Now you are going to feel the foggy morning mood and atmosphere.

In the next step I do the left side big tree. With contrast to the light the dark color of the tree creates the shadow balance as well. For that I prepare a color using ultramarine blue, little cadmium orange, payne’s grey, cobalt turquoise and raw umber. I define the left front tree with the dark color pigment using brushes no 30 and 12 at first.
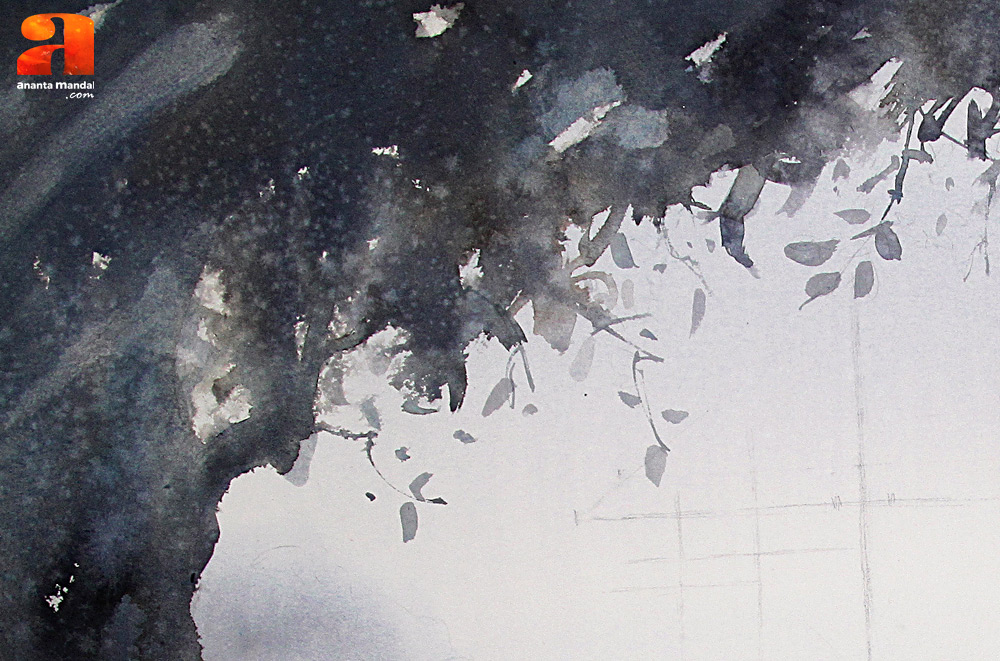
After that first using 00, 1, 3, 6 size brushes I create some twigs, branches and leaf that are coming out from the tree. Here the color is made more thin with water and then applied from light to dark to show the perspective. After color application is done here I use a tissue paper and spray clean water as I want to create some extraordinary effects on the tree. So now I take another break for the painting to be dried completely in every parts.
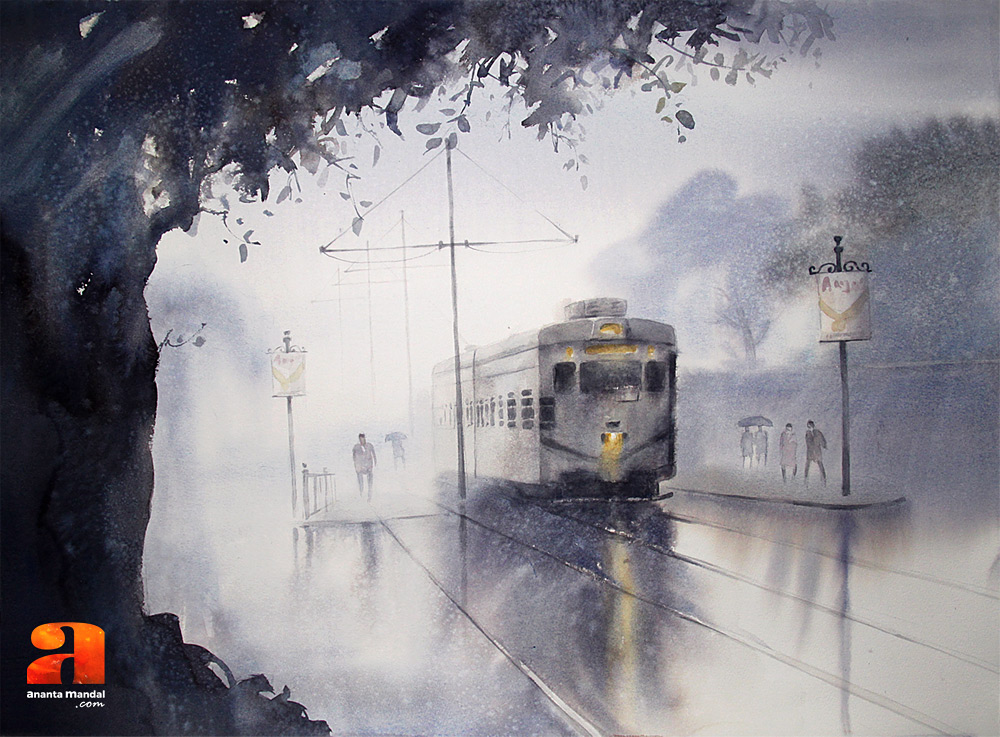
As far now I have completed almost and reached to the last step. Here I will define every possible objects I feel needed to be. Using brushes no 00, 1, 2, 3, 4 I draw out the windows and door of the tram. Also I prominent more the front face of the tram. Then I detail light post, hoarding post, tram lines and street lines as well. Small brush strokes are used to draw out the figure movements. Progressively, darker shapes and lines are added to build up perspective and the detail of major elements of the painting. Maybe it seems little boring but this is very important part for the watercolor landscape painting.
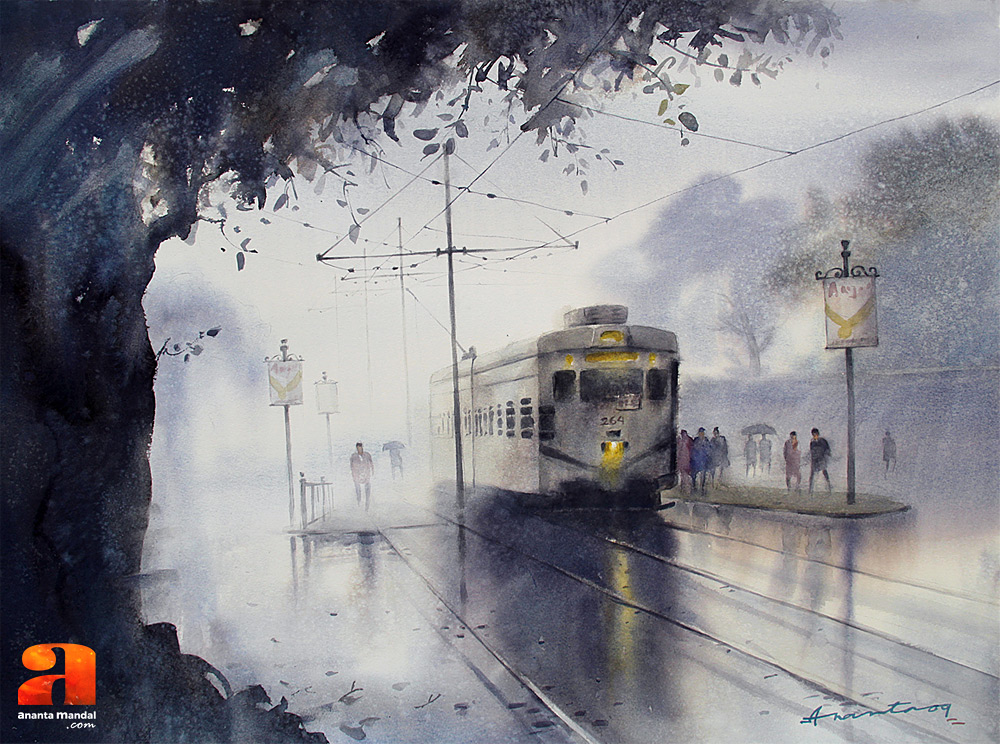
Finally the painting is about to end. Here I add the finishing touch! For that I do more soft tonal contrast on human figures and their reflections, as well as on the tree and roads. So I end up the painting giving more details. I use brushes no 00, 1, 2 here. Lastly the most important thing is the perspective of wires above the tram, so I do it very carefully along with the wire joints, tram, tram lines, hoarding post, light post etc, some twigs and tree leaves on the fore ground.
Here it is the final painting, ready! I have named the painting ‘Early Morning in Kolkata’ Size – 22 × 30 inches, Medium – Watercolour on 300gsm Fabriano paper, Year – 2009.
It is one of my favorite paintings as I have said before.
Hope you enjoyed the step by step demonstrations of this watercolor painting. That’s it for now! Thanks very much for your time for reading, happy painting!
*See Also:
*Also if you want to watch a short video clip of similar watercolor landscape paintings you can visit my Instagram page, for that just click the play button below!
LEAVE A COMMENT
Your email address will not be published. Required fields are marked *

Never Miss a Post
Ananta Mandal Email NEWSLETTER is only one click away
We respects your privacy, your info and Email address are safe with us, That is our promise to you.
Wow, very interesting and attractive photos and blog post, i likes it, i will recommend to others, sure
Thank you very much for your warm compliments!!